Messaging Campaigns: Create recurring campaign
On the “list of campaigns” tab, click on the button on the top right “New campaign” and select the option “recurring”
-png.png?width=688&height=429&name=image-20241031-125600%20(1)-png.png)

Recurring campaigns are created by property. One property is connected to one PMS/CRM only.
- You will be able to create campaigns on your own if the properties are connected to one of the PMS/CRM below:
Sihot | eZee | WinTouch | Host | Protel | QuoHotel | ICG | Infor HMS | WebRezPro | Hestia | Resalys | Engisoft | SiteMinder | HTI | Smoobu | Sulcus | Sitec | Mews | AboutHotelier | Clocks PMS | NewHotel | TesiPro | Acigroup Previo |CloudBeds | OracleCloud | RMS |Experience Hotel | Class 1 | Prestige | Custom CSV Configurations
- If the properties are not connected to one of the PMS/CRM above, the campaigns needs to be configured by the support team. In this case, when attempting to create a campaign, the following message will appear:
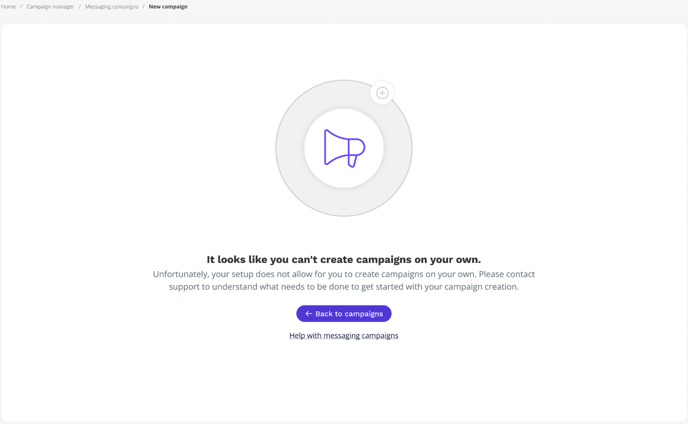
If at least one of your properties is connected to one of the PMS/CRM mentioned above, a new area will open for you to start creating your campaign.
Step 1: Start creating your campaign
You must fill in:
-
Campaign category
-
Pre-arrival
-
If you are creating a campaign to be sent before guest arrival
-
Ex: booking confirmation, recommendations on things to do…
-
-
-
Arrival
-
If you are creating a campaign to be sent regarding the guest arrival
-
Ex: Inform about arrival details, send online check in link…
-
-
-
In-Stay
-
If you are is creating a campaign to be sent during the guest stay
-
Ex: Hotel services upsell, information about events during the guest stay…
-
-
-
Departure
-
If you are creating a campaign to be sent regarding the guest departure
-
Ex: Inform about check out procedure, request a review…
-
-
-
Other
-
If none of the categories above are applicable
-
Ex: Special events…
-
-
-
-
Name
-
Maximum characters = 40
-
-
Property
-
Select the property from which the campaigns should be sent
-
-
Chatbot
-
Select the correspondent chatbot
-
Properties and chatbots will only be display if:
-
The property associated has one of the PMS mentioned above configured
-
The chatbot has at least one of the following channels connected (WhatsApp or SMS)
-
You have the permission to view/manipulate the chatbot and property in the console
If you can’t find the property it may be because the property is not connected to a PMS/CRM that supports the creation of campaigns by you.

Step 2: Set up the campaigns trigger
You will define when the campaign should be triggered
You must fill in:
-
Trigger period
-
Always
-
The campaign will be sent for an unlimited period of time, once approved and active
-
-
Choose a range of dates
-
The campaign will be sent in a specific period of time according to the start date/end date or both that you select, once approved and active
-
You can set up only a start date or a end date as well.
-
-
-
-
Trigger (you choose in what moment we will try to send the campaign for the selected trigger period - previous input)
-
Time-based
-
The campaign will be triggered based on the selected hours and days of the week
-
applicable to all PMS/CRM configurations
-
-
-
Event-Based
-
The campaign will be triggered based on the reservation status change
-
applicable only to certain PMS configurations
-
-
-
If event-based trigger is not applicable to the PMS/CRM configured in the property selected, only time-based will be displayed!
Step 3: Define your campaign’s target group
You will define who should receive the campaign, according to the trigger selected in step 2.
If on step 2, time-based was selected as a trigger, you must define the target as below:

-
Reservation status + check-in date (define target according to reservation status and check in date)
-
Reservation status:
-
Confirmed
-
Checked In
-
Checked out
-
Canceled
-
-
Check in date
-
n days before sending the message
-
n days after sending the message
-
on the same day this message is sent
-
-
Examples:
Campaign is sent to all reservation that have status “confirmed”, 3 days before the check-in date

Campaign is sent to all reservations that have status “checked-in” on the same day as the check in date.

Campaign is sent to all reservations that have status “checked in”, 2 days after the check in date.

-
Reservation status + check-out date (define target according to reservation status and check out date)
-
Reservation status
-
Confirmed
-
Checked In
-
Checked out
-
Canceled
-
-
Check out date
-
n days before sending the message
-
n days after sending the message
-
on the same day this message is sent
-
-
Examples:
Campaign is sent to all reservation that have status “checked-in”, 3 days before the check-out date

Campaign is sent to all reservations that have status “checked-out” on the same day as the check out date.

Campaign is sent to all reservations that have status “checked-out”, 2 days after the check out date.

If on step 2, event-based was selected as a trigger, you must define the target as below:

-
Reservation status: (define target according to reservation status changing to)
-
Confirmed
-
Checked in
-
Checked out
-
Canceled
-
Examples:
Campaign is sent to all reservation that have status “confirmed” (in the specific trigger period selected in step 2)
Ex: Everytime a reservation is confirmed, you want to send a message to the guest confirming the booking.

Campaign is sent to all reservation that have status “checked-in” (in the specific trigger period selected in step 2)
Ex: Everytime a guest checks-in, you want to send a message to welcome the guest to the hotel.

Campaign is sent to all reservation that have status “checked-out” (in the specific trigger period selected in step 2)
Ex: Everytime a guest checks-out, you want to thank the guest and ask for a review

Campaign is sent to all reservation that have status “canceled” (in the specific trigger period selected in step 2)
Ex: Everytime a reservation is canceled, you want to send a message to the guest confirming that the reservation has been canceled.

Step 4: Configure the channel
You must fill in:
-
Channel (mandatory field)
-
WhatsApp
-
SMS
-
-
Fallback (optional)
-
SMS
-
The available options are all channels that belong to the selected property and chatbot (in step 1).
If SMS is selected as a main channel, no fallback will be displayed.
Step 5: Create a message to be sent to your guests
In this final step, you will define the message languages, as well as create the content to be sent by the channels selected on step 4.
-
Message languages:
-
English will not be displayed, as it selected by default
-
Other languages related to the chatbot selected on step 1 will be displayed
-

-
WhatsApp:
-
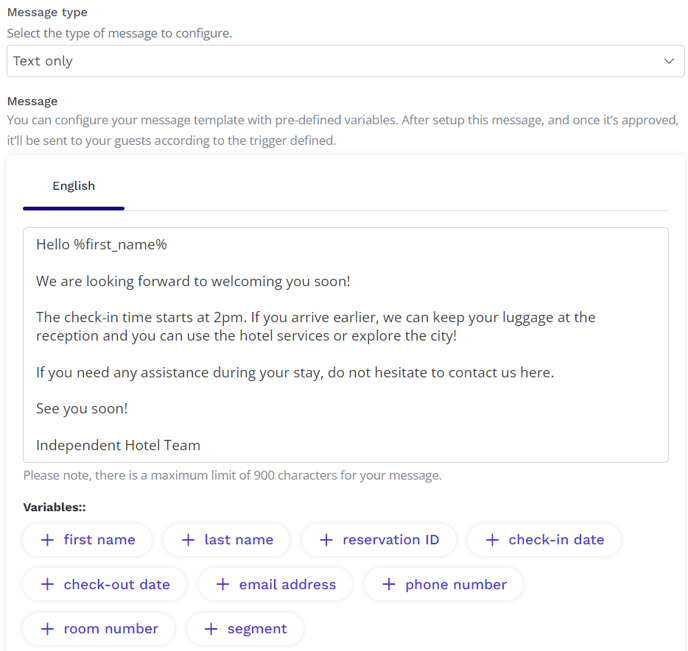
Message type:
-
Text only
-
Create a message with only text and variables
-
-
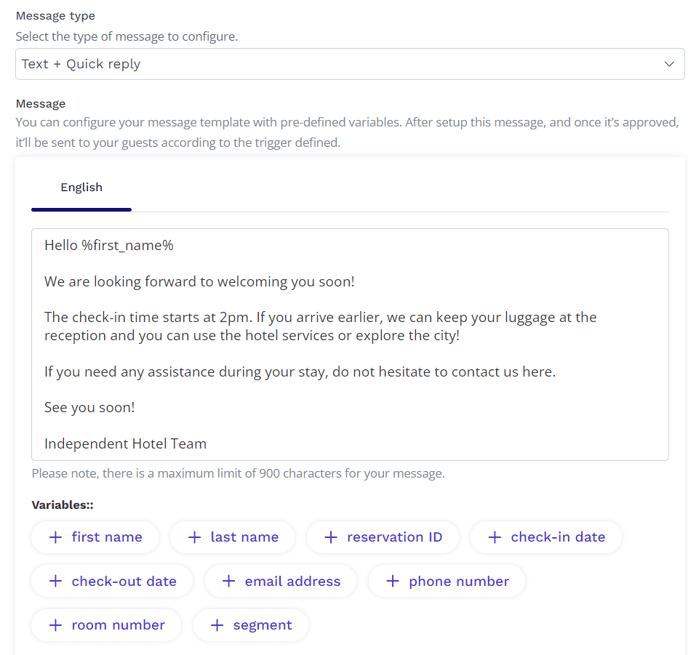
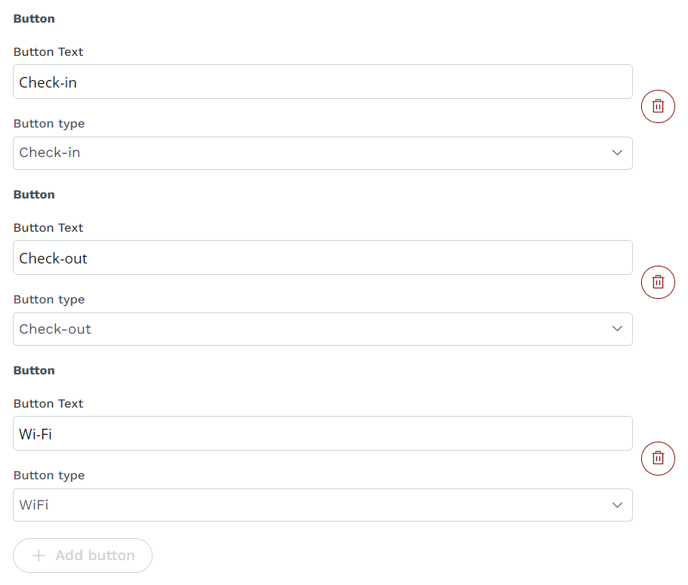
Text + Quick reply
-
Create a message with text, variables and a max. of 3 buttons with flows or FAQs
-
-
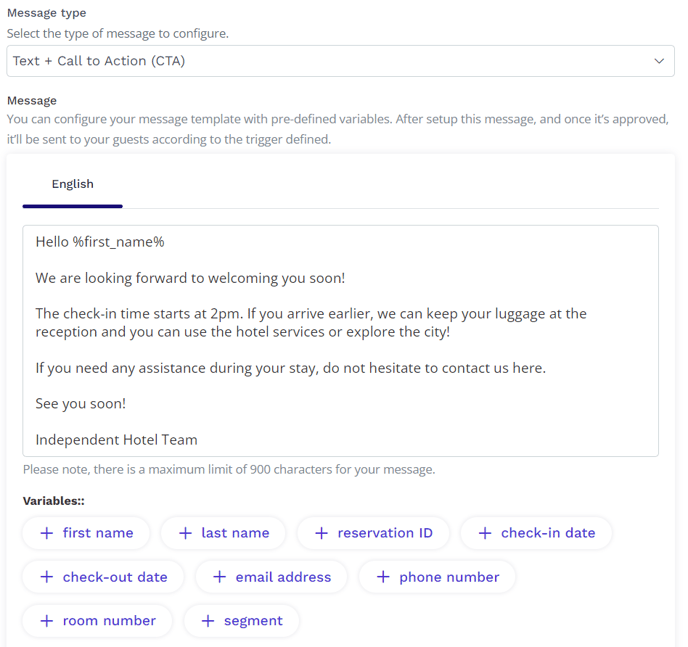
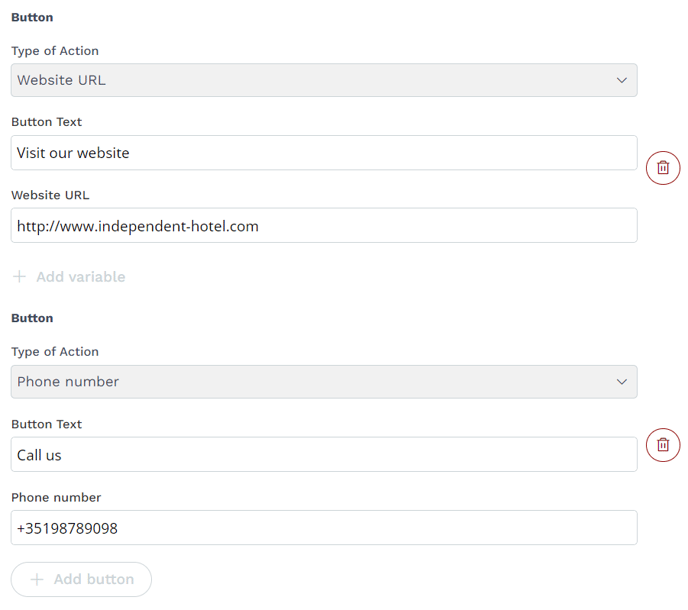
Text + Call to action
-
Create a message with text, variables and 2 call to action buttons (one phone number and/or one website URL)
-
-
-

-
- Message: You must type in all languages selected
Examples:
WhatsApp: Text Only
WhatsApp: Text + Quick reply
WhatsApp: Text + Call to Action
-
SMS:
-
Message:
-
Text only (You must write text in all languages selected)
-
Create a message with only text and variables
-
-
-

Example:

Important Notes:
- The variables in purple can be added to the message body and will use information retrieved from the PMS for the specific guest.
-
There are character limits according to the type of message:
-
WhatsApp
-
Text: 1600
-
Quick Reply: 1024
-
Call to action: 640
-
- SMS
- Text: 160
-
- Selecting SMS as a fallback means that, if we are unable to send the message via the first channel (WhatsApp), we will send it by using the fallback channel (SMS).
Submit your campaign
Once step 5 is finished, you can submit your campaign for approval, by clicking on the button "Submit for approval" at the end of the page on step 5.

Once a campaign is submitted for approval, the campaign creator will receive a console notification and an email notification (if email notifications are active in the console) and the status of the campaign will be PENDING (regardless of the channel chosen).
This information will also be displayed in the “List of campaigns” tab